TenmaTech Wireless Microphone Manual: A Comprehensive Guide
TenmaTech offers a one-year warranty and 24/7 customer support for its wireless microphone systems‚ ensuring confident professional use and problem resolution.
TenmaTech’s wireless microphone system is designed for clear and reliable audio transmission‚ offering a user-friendly experience for various applications. This system prioritizes ease of use alongside professional-grade performance. It’s built upon a foundation of robust reporting and learning systems‚ similar to those found in healthcare incident reporting like CIRSmedical‚ emphasizing continuous improvement and safety – translating to a dependable product.
The system includes wireless microphones‚ an iPhone receiver‚ charging cables‚ a storage bag‚ and a detailed user manual. Like CIRS‚ which encourages reporting of incidents‚ TenmaTech encourages users to contact their 24-hour customer support for any questions or concerns‚ ensuring a positive experience and swift resolution of any issues. This commitment to service underscores the quality and reliability of the TenmaTech system.
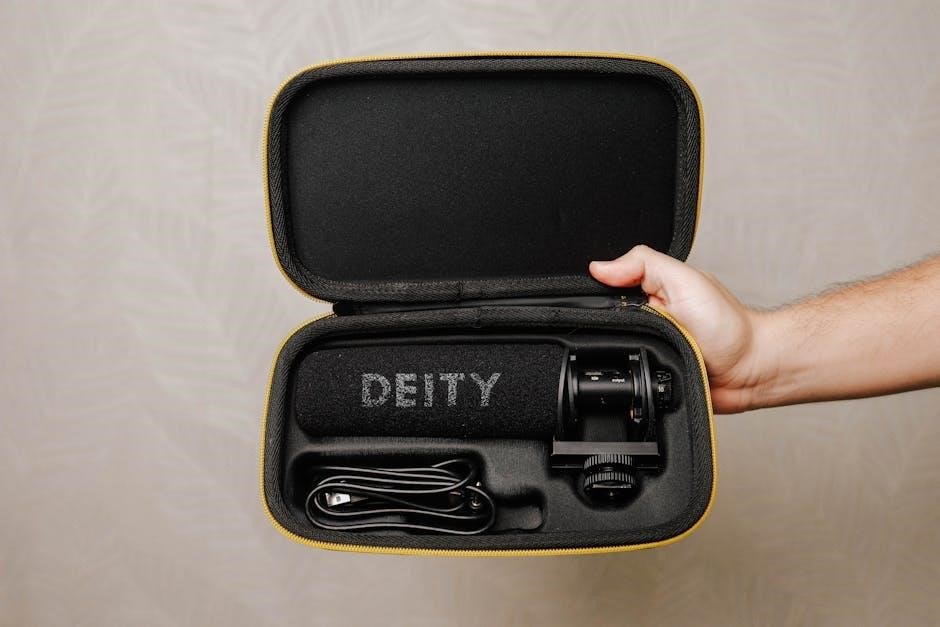
Unboxing and Package Contents
Upon opening your TenmaTech Wireless Microphone package‚ you’ll find carefully arranged components designed for immediate use. The package includes two wireless microphones‚ ensuring redundancy or dual-person applications. A dedicated iPhone receiver facilitates seamless connectivity and operation with your Apple device. Conveniently‚ two Type-C charging cables are provided for powering both microphones‚ mirroring the accessibility of reporting systems like CIRSmedical.
Furthermore‚ a durable storage bag is included to protect your investment during transport and storage. A comprehensive user manual guides you through setup‚ operation‚ and troubleshooting‚ similar to the detailed instructions found within incident reporting guidelines. TenmaTech prioritizes a complete package‚ backed by a one-year warranty and 24-hour customer support‚ offering peace of mind and a professional experience.
System Overview: Components and Functionality
The TenmaTech Wireless Microphone System centers around reliable audio transmission and user-friendly operation. The system comprises two wireless microphones‚ designed for clear voice capture‚ and a dedicated iPhone receiver for immediate signal processing. Like CIRSmedical’s reporting structure‚ each component plays a vital role. The microphones utilize wireless technology to transmit audio‚ eliminating cable clutter and enabling freedom of movement.
The iPhone receiver decodes the signal‚ providing audio output directly to your device. This system mirrors the accessibility of incident reporting‚ allowing quick information access. Functionality includes adjustable volume control and sensitivity settings. The system’s design prioritizes ease of use‚ mirroring the simplified reporting process of systems like CIRS‚ ensuring a smooth and efficient user experience‚ backed by TenmaTech’s support.
Setting Up Your TenmaTech Wireless Microphone
TenmaTech’s system setup involves charging microphones and the receiver via Type-C cables‚ pairing them with your iPhone‚ and conducting an initial audio test.
Charging the Microphones and Receiver
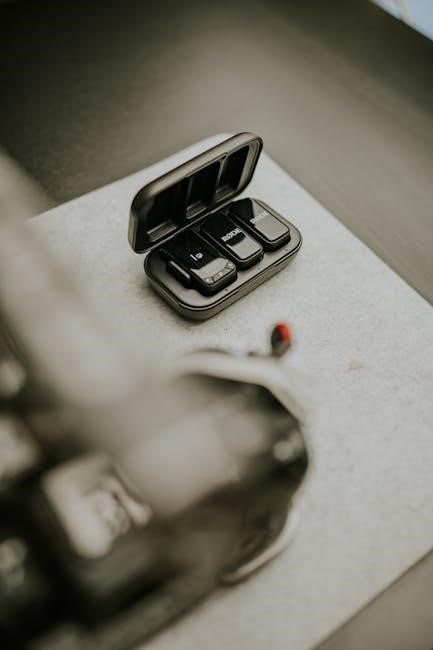
TenmaTech wireless microphones and the receiver unit require charging before initial use and periodically thereafter to ensure optimal performance. The package includes two Type-C charging cables specifically for this purpose.
To charge a microphone‚ connect one end of the Type-C cable to the charging port on the microphone and the other end to a suitable USB power source – a USB wall adapter or a computer’s USB port will work. A red LED indicator will illuminate during the charging process. Once fully charged‚ the LED will typically turn green or off.

The receiver also charges via Type-C. Follow the same procedure as with the microphones. Allow approximately 2-3 hours for a full charge of both the microphones and the receiver‚ although charging times may vary depending on the power source;
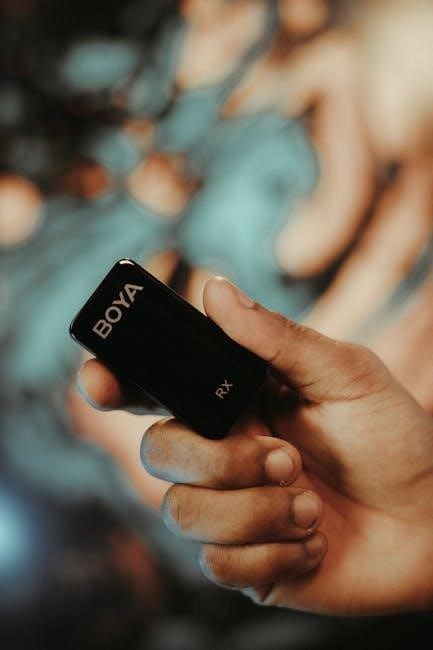
Pairing the Microphones with the iPhone Receiver
TenmaTech’s wireless microphones are designed for seamless pairing with the iPhone receiver. Ensure both the microphone and receiver are powered on before initiating the pairing process. The receiver will automatically enter pairing mode upon initial power-up‚ indicated by a blinking blue LED.

To manually initiate pairing‚ access the settings menu on your iPhone and navigate to the Bluetooth settings. The TenmaTech receiver should appear in the list of available devices. Select the receiver to establish a connection.
Once connected‚ the receiver’s LED will turn solid blue. Repeat this process for each additional microphone you wish to pair. The system supports multiple microphones for simultaneous use. If pairing fails‚ ensure no other Bluetooth devices are interfering.
Initial System Testing
Following successful pairing‚ conduct a thorough initial system test to verify functionality. Speak into the microphone at a normal speaking volume and observe the audio level indicator on the iPhone receiver. Ensure clear audio transmission without distortion or interruption.
Walk around the intended operating area while speaking into the microphone to assess the wireless range and signal stability. Note any dropouts or interference. Adjust the microphone’s position and orientation to optimize signal reception.
Test the system with various audio sources‚ such as music or pre-recorded speech‚ to confirm compatibility. Verify that the volume control on the receiver effectively adjusts the audio output level. If issues arise‚ revisit the pairing process or consult the troubleshooting section.

Using the TenmaTech Wireless Microphone
TenmaTech’s system delivers clear audio; utilize controls for optimal performance‚ adjusting volume and sensitivity to suit your environment and desired sound quality.
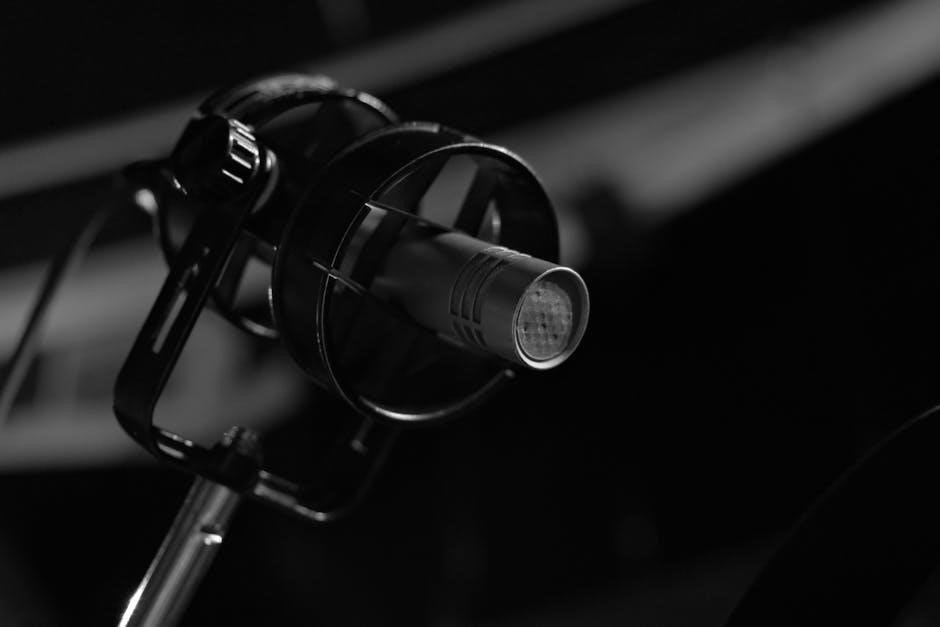
Microphone Operation and Controls
TenmaTech wireless microphones are designed for intuitive operation. Power on/off via a simple switch‚ typically located on the microphone body. Ensure the microphone is paired with the receiver before use – a successful connection is usually indicated by a stable LED.
These microphones generally feature adjustable sensitivity settings‚ allowing you to optimize audio capture based on your proximity to the source and ambient noise levels. Experiment with these settings to achieve the clearest possible sound. Be mindful of microphone placement; direct the microphone towards the sound source for optimal pickup.
Avoid covering the microphone head‚ as this can cause feedback or muffled audio. Familiarize yourself with any additional controls‚ such as mute buttons‚ for seamless performance during presentations or recordings. Proper handling and care will extend the life of your TenmaTech microphone.
Receiver Operation and Controls
The TenmaTech receiver is the central hub for your wireless microphone system. Power on the receiver using the designated power button‚ and it will automatically begin searching for paired microphones. A successful connection is typically indicated by a solid LED light.
The receiver features volume control knobs or digital adjustments to regulate the audio output level. Carefully adjust the volume to achieve a clear and balanced sound without distortion. Many models also include sensitivity controls to fine-tune the audio input.
Pay attention to the receiver’s LED indicators‚ which provide valuable information about the connection status‚ battery levels‚ and potential interference. Ensure the receiver is positioned for optimal signal reception‚ away from obstructions and potential sources of interference.
Adjusting Volume and Sensitivity
TenmaTech receivers offer precise control over audio levels. Begin by setting the receiver’s volume to a moderate level. Gradually increase it while speaking into the microphone‚ monitoring for clarity and avoiding distortion. If the audio is too quiet‚ increase the volume; if it’s distorted‚ reduce it.
Sensitivity controls adjust the receiver’s responsiveness to the microphone signal. Higher sensitivity picks up quieter sounds but may also introduce more background noise. Lower sensitivity reduces noise but requires speaking closer to the microphone.
Experiment with both volume and sensitivity to find the optimal balance for your environment and voice. Proper adjustment ensures clear‚ crisp audio without unwanted noise or distortion‚ maximizing the performance of your wireless system.

Troubleshooting Common Issues
TenmaTech systems may experience pairing‚ audio‚ or interference problems; solutions involve checking connections‚ reducing distance‚ and optimizing frequency settings for clarity.
Microphone Not Pairing
If your TenmaTech wireless microphone fails to pair with the receiver‚ begin by ensuring both devices are adequately charged. Confirm the microphone is in pairing mode – typically indicated by a flashing LED. Bring the microphone and receiver closer together during the pairing process‚ minimizing potential interference.
Restart both the microphone and the receiver. If issues persist‚ attempt to pair only one microphone at a time to isolate the problem. Check for any obstructions between the devices. Remember that TenmaTech provides customer support for pairing assistance‚ offering a solution within 24 hours. A reset of the receiver might also resolve pairing conflicts.
No Audio Output
If you experience no audio output from your TenmaTech wireless microphone system‚ first verify the microphone is powered on and properly paired with the receiver. Confirm the volume levels on both the microphone and receiver are appropriately adjusted and not muted. Ensure the correct input source is selected on your connected device (e;g.‚ iPhone).
Test with a different audio cable or connection if applicable. Low microphone battery levels can also cause audio loss‚ so check the battery indicator. TenmaTech’s 24/7 customer support can assist with troubleshooting. A system reset of the receiver may resolve internal processing issues preventing audio transmission. Confirm microphone functionality with a separate audio device.
Interference and Static
Experiencing interference or static with your TenmaTech wireless microphone? Several factors can contribute to this. First‚ identify potential sources of radio frequency interference nearby‚ such as other wireless devices‚ fluorescent lights‚ or large metal objects. Try relocating the receiver and microphone to minimize obstructions.
Experiment with different frequency channels‚ if your system allows‚ to find a clearer signal. Ensure all cables are securely connected. TenmaTech’s system‚ like CIRS reporting systems for healthcare‚ relies on clear signals. Consider the environment; crowded spaces increase interference. Contact TenmaTech support for advanced troubleshooting and frequency optimization guidance if the issue persists.
Advanced Features and Settings
TenmaTech’s system‚ similar to CIRSmedical’s reporting‚ benefits from optimized frequency selection and battery management for reliable performance and extended usability.
Frequency Selection and Optimization
TenmaTech wireless microphones utilize advanced frequency agility to minimize interference and ensure a clear‚ stable audio signal. Understanding your environment is crucial; areas with high radio frequency activity may require manual frequency selection. The system‚ much like CIRS’s incident reporting‚ relies on identifying and mitigating potential issues.
To optimize performance‚ scan for available frequencies using the receiver’s scanning function. This identifies the clearest channels for transmission. Avoid frequencies known to be congested by local broadcasters or other wireless devices. Regularly re-scanning is recommended when moving to new locations. Proper frequency selection‚ similar to error reporting in healthcare systems like CIRSmedical‚ proactively prevents problems and enhances overall system reliability. Experiment with different channels to find the most consistent signal.
Battery Life Management
TenmaTech wireless microphones are designed for extended performance‚ but optimal battery life depends on usage. Fully charge both microphones and the receiver before each use‚ utilizing the provided Type-C cables. Avoid leaving the devices continuously plugged in after reaching full charge‚ as this can degrade battery health – a preventative measure akin to CIRS’s proactive incident reporting.
Microphone battery life varies based on transmit power and usage patterns. Lowering the microphone’s sensitivity can conserve power. The receiver’s LED indicators provide real-time battery status. Consider carrying spare‚ fully charged batteries for uninterrupted operation‚ especially during lengthy events. Like a robust CIRSmedical system‚ preparedness is key. Regularly check battery levels and replace or recharge as needed to avoid unexpected interruptions.
Understanding LED Indicators
TenmaTech utilizes LED indicators on both the microphones and receiver to communicate system status. A solid green light on the microphone signifies power is on and the unit is paired. A blinking red light indicates pairing mode or a connection issue – similar to how CIRS flags critical incidents. On the receiver‚ a solid blue light confirms a stable connection to the microphone.
A flashing blue light suggests the receiver is searching for a signal. Red lights on the receiver often denote low battery or a potential malfunction. Pay close attention to these visual cues‚ as they provide valuable insight into system operation. Just as CIRSmedical relies on clear reporting‚ understanding these indicators ensures efficient troubleshooting and optimal performance. Refer to the manual for a complete LED code breakdown.

Safety and Warranty Information
TenmaTech provides a one-year warranty‚ covering defects and ensuring customer satisfaction. Always follow safety precautions to avoid damage or injury during use.
Important Safety Precautions
TenmaTech prioritizes user safety. Avoid exposing the wireless microphone or receiver to extreme temperatures‚ humidity‚ or direct sunlight‚ as this can cause malfunction or damage. Do not disassemble the devices; any unauthorized modifications will void the warranty.
Handle the microphones with care‚ avoiding drops or impacts. Keep the charging ports clean and free of debris. When charging‚ use only the provided Type-C cables and a compatible power source.
Be mindful of potential interference from other wireless devices. Do not operate the microphone near flammable materials or liquids. Report any unusual behavior‚ such as overheating or smoke‚ immediately and discontinue use. Always follow local regulations regarding wireless device operation.
TenmaTech Warranty Details (1-Year Warranty)
TenmaTech proudly offers a comprehensive one-year warranty on all wireless microphone systems‚ commencing from the original date of purchase. This warranty covers defects in materials and workmanship under normal use. Should a defect arise‚ TenmaTech will‚ at its discretion‚ repair or replace the faulty product free of charge.
This warranty does not cover damage resulting from misuse‚ abuse‚ accidents‚ unauthorized modifications‚ or improper maintenance. Proof of purchase is required for all warranty claims. To initiate a claim‚ please contact TenmaTech customer support (see contact information below).
Shipping costs for returning the product are the responsibility of the customer. TenmaTech is not liable for any consequential damages arising from product failure.
Customer Support Contact Information
TenmaTech is dedicated to providing exceptional customer support. For any questions‚ concerns‚ or warranty claims regarding your wireless microphone system‚ please don’t hesitate to reach out to our friendly and knowledgeable support team. We are available 24 hours a day‚ seven days a week‚ to assist you.
You can contact us via email at support@tenmatech.com. Alternatively‚ you can call our dedicated support line at 1-800-TENMATECH (1-800-836-6283). Please have your product model number and purchase date readily available when contacting support to expedite the assistance process.
Visit our website at www.tenmatech.com for FAQs‚ troubleshooting guides‚ and additional resources. We strive to respond to all inquiries within 24 hours.